I have been a busy little bee in the workshop lately, so busy in fact that I’ve struggled to find time to write new posts! Now that the holiday season is almost upon us, I thought I’d better share these little projects with you.
First, a simple Dollar Tree project. They have this cute little plastic tote that I just love because it goes perfectly with my other Christmas decor. But I felt like it needed a little dressing up. All I did was hot glue two strips of natural rope (also from Dollar Tree) to the top edge, so that one piece was above the rim and the other was below. Once that was done, I glued some ribbon, that I had in my stash, over the seam. I think it’s pretty cute and not too shabby for less than two bucks!
The next project is also made with dollar store items. These gift bags were at Dollar General for $2.50. My sweet friend picked them up for me because she knows how I feel about red trucks and Christmas trees. I didn’t know what I was going to do with them at the time, but I’m glad she grabbed them because they will probably sell out quickly since it’s such a poplar thing right now.
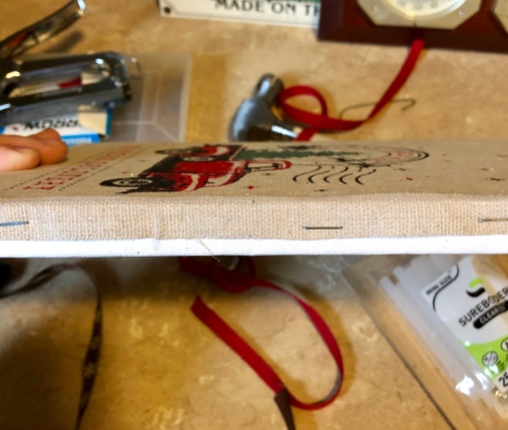
After looking at them laying on my workbench for a week, I decided I needed to figure it out so I headed to Dollar Tree for supplies. Turns out, all I needed was an 8″ x 10″ canvas. I pulled the seams out of the bag and ironed it on the back side to remove the creases. Next, I positioned the design how I wanted it, stapled it down around the edges and then trimmed off any excess material. As you can see in the picture above, the bag didn’t quite wrap completely around the frame, so once that was done, I hot glued some ribbon around the edge of the canvas. And that’s it! I love this little sign and I’m sure I would have paid a lot more for it if I’d purchased it at a store. All said this cost $2.25 because I only used one of the gift bags!
The next project was created with a Goodwill find and items I already had on hand, but that are also inexpensive. I found this frame at Goodwill for $2.99. I just thought it was really cute so it came home with me.

I decided that instead of using it as a picture frame, I would create a little Christmas shadow box, or diorama if you will. I painted it with three layers of white acrylic paint, and then distressed it by running a popsicle stick over each layer while it was still wet…a bit unorthodox perhaps, but I love the results! once it was dry, I traced the shape of it onto a piece of chip board and cut it out to create a back. After that, I glued the glass in place and then filled it with my little goodies (all of which came from the dollar store or Walmart). Next I picked out a piece of Christmas scrapbook paper, from the collection I’ve had since scrap-booking was at it’s peak, traced the shape, cut it out and glued it to the chip board. Once that was done I glued the back on to the frame. I think it is super cute and it goes well with the other items I used in the display on my dining room buffet.
Last but not least, I did some sewing…and as I’ve said before, I don’t sew. This will not be a tutorial. You should not learn how to sew from me; find someone who actually knows what they are doing and learn from them! I’m just winging it over here!
Now that that’s out of the way…
I made Christmas covers for the throw pillows on my couch. I knew I would be doing this project when I found some red and white mattress ticking on clearance at Walmart this summer. It was three bucks a yard! I bought three yards, lol. For the covers, I basically cut a strip of fabric that will wrap all the way around the pillow and over lap in the back. I hemmed the ends and the folded it up inside out like an envelope and sewed the edges. Then I just turned it right side out and put the pillow in through the opening in the back.
For the fabric decorations on the front, which I added before sewing the actual pillow case, I cut some stencils out of graph paper, pinned them to my accent fabric (All of this fabric was also purchased at Walmart.) and cut out my shapes. Once that was done I used fabric glue to attach them and when that dried I did a zigzag stitch around all the edges, just for looks. After the pillow case was complete, I hand sewed all the buttons in place.
I love these, and it’s a good thing because this project stretched my abilities and patience. Not only was it difficult with my limited sewing skills, I also managed to break my sewing machine and had to order a new part. Nevertheless, I think they are adorable and I’m super pleased with the end result.
And did you notice that they are mirror image?…this makes me happier than I can reasonably explain; I absolutely hate when I have matching pillows, one on each end of the couch, and the stuff on them faces the same way! I’m weird, I know.
So that’s what I’ve been up to the past few weeks. That, along with going to the attic and hauling out way too many totes filled with Christmas decorations! I also have some more projects in the works and I hope to have another post up very soon.
Whatever you’ve been up to, I hope this season is finding you grateful, festive and blessed.
Keep. It. Creative.


So cute!
LikeLike
Thank you!
LikeLiked by 1 person
These are beautiful ideas! My most recent post is pictures how I set up my holiday decorations in my new home! Check it out!
LikeLike